What is the best way to fill a silage clamp?
There are two main options:
The Dorset wedge
In the traditional method, the Dorset wedge, the clamp is loaded at an angle using a steep ramp. The advantage of this system is that it minimises the area of the forage exposed to air during filling and avoids exposing earlier cuts to air again when the clamp is opened to put in the next cut.
More recently, however, horizontal layering has become used as an alternative. However, whichever method is chosen, clamps should be filled in layers no more than 15 cm deep.
Layering
 Potential benefits of layering:
- Better compaction as the crop is spread thinner over a larger surface area
- More room for two machines on the clamp – important if the forage is coming in fast
- Easier to roll a flatter surface
- Less risk of clamp slippage with wet crops or between cuts
- More consistent silage quality from top to bottom during feed-out
Potential disadvantage of layering:
- Bigger surface area exposed to air during filling
- To put in another cut the whole clamp needs un-sheeting
- It may take longer to fill the clamp if only one machine is on it, as there is a bigger surface area to roll
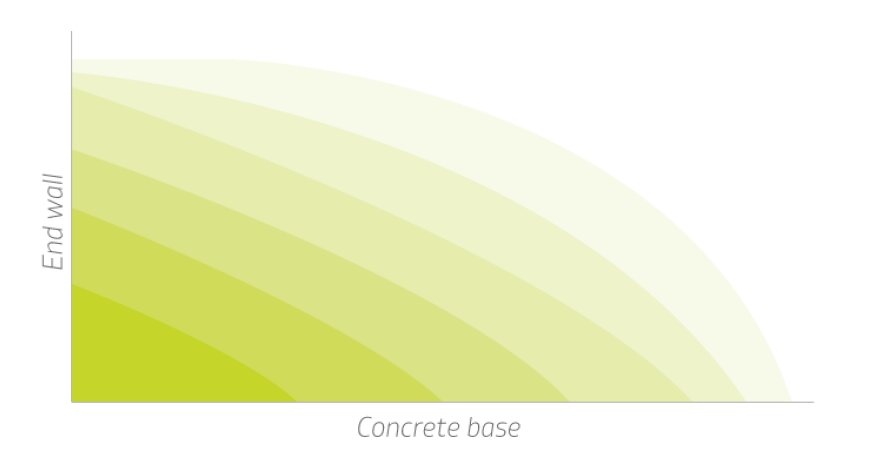
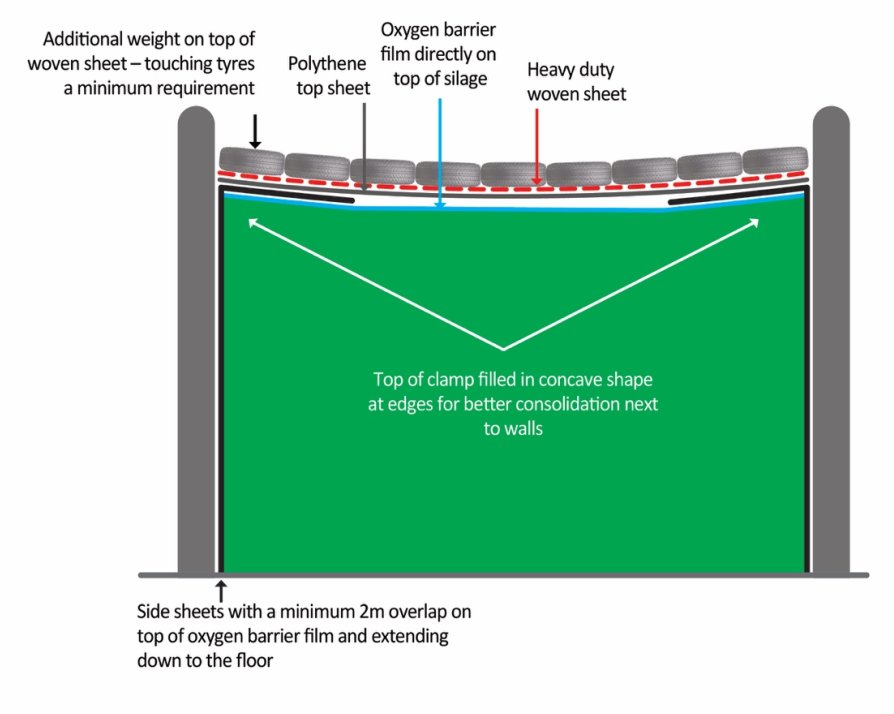
Whichever method is used, during filling keep the sides filled higher than the middle. This ensures the forage next to the walls can be rolled properly.
If you are filling the next day or the clamp is opened to put in another cut, put a layer of fresh forage on top before rolling commences, as running tractor wheels over silage that has already stabilised has the effect of aerating this material, causing aerobic spoilage (heating) – seen as a line of poor silage across the clamp at feed-out.
Why is it important to fill and seal silage clamps quickly?
The longer the clamp remains open, the more sugars will be wasted by plant and microbial respiration, which means these sugars will no longer be available for fermentation. It will also allow yeasts and moulds longer to multiply, which will make the silage more likely to spoil later when opened.
Using a contractor may allow the clamp to be filled faster, but it is important not to fill it so fast that rolling cannot keep up.
How to roll a silage clamp?
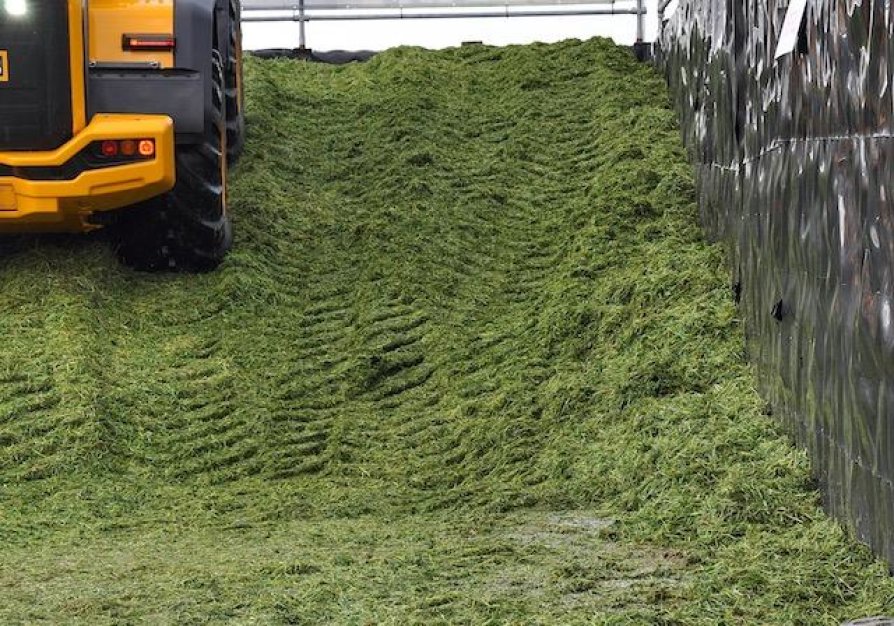
Good consolidation is probably the single most important step in silage-making. It minimises the amount of air trapped in the silo initially, which allows fermentation to begin, and means wasteful microbial respiration plus respiration by the plant will both cease sooner. Rolling will also bruise the forage a little, helping to release more sugars for fermentation.
In a well-consolidated clamp, yeast numbers will also be lower when the clamp is opened for feeding, reducing the risk of aerobic spoilage (heating).
For grass in excess of 27% dry matter fill the clamp quickly and in thin layers (maximum 6 inches / 15 cm deep) and roll with plenty of weight. It is advised that packing tractor weight (tonnes) should equal the forage delivery rate (tonnes fresh weight/hour) x 0.25. Use single wheels inflated to the maximum recommended pressure, as tyres are often designed for low ground pressure – which is not what we want. Duals simply spread the weight over a bigger area, reducing the point pressure. Do not over-roll as the spongy nature of the grass will pump air in and out, providing more oxygen for respiration and heat production. Direct cut some wetter grass to seal the top before sheeting.
With grass below 20% dry matter, load with a steep ramp and take care not to over-roll. Use dual-wheel tractors or a crawler to load the clamp as excess contact pressure and rolling will increase effluent. Do not load the clamp too high or over-compress near the walls as wet grass exerts a greater pressure on the walls.
Do not roll the clamp for more than about 30 minutes in the evening. It is more important to get the sheet on as most of the trapped oxygen will get used up quickly and be replaced by carbon dioxide.
If filling over more than one day, do not roll immediately after uncovering the next morning as this will simply push out the carbon dioxide and replace it by oxygen. Only begin rolling after a new layer of grass has been placed in the clamp.
Why is it important to get rid of air from a grass silage clamp?
Although growing crops will naturally contain high levels of aerobic (requiring oxygen) microorganisms, most will die out as soon as conditions in the silo become anaerobic (no oxygen present). This is important as their activities do not benefit the fermentation process. Indeed, they waste sugars required for fermentation.
Lactic acid bacteria are the main bacteria involved in a silage fermentation. Although these bacteria can grow in the presence and absence of air, they will dominate the silage fermentation most effectively when air is excluded, maximising the efficient production of lactic acid.
Fungi (yeasts and moulds) are also a problem for silage as they are responsible for aerobic spoilage (heating and moulding). Moulds need air to grow (although in its absence they can produce spores that germinate and grow when it is present again). Similarly, yeasts grow much faster in the presence of air but will survive in its absence.
By filling silage clamps quickly and rolling well, the amount of air trapped initially is minimised and quickly used up. As well as allowing the proper fermentation to begin sooner, this minimises yeast numbers at opening ,which reduces the risk of aerobic spoilage.
How to seal and weight a grass silage clamp?
The silo must be sealed as quickly as possible to minimise the time exposed to air initially and to allow the fermentation to start quickly. Line the walls beforehand, leaving enough over to allow a 2 metre overlap with the top sheet and to reach down to the ground.
Once the clamp has been filled, place an oxygen barrier film over the top of the forage. Despite being much thinner, oxygen impermeable cling film has been shown to be more effective than conventional clamp sheeting. It also sucks down onto the surface contours of the silage, giving a better seal.
Next, fold the side sheets over the oxygen barrier film on top of the silage, followed by one or two polythene top sheets.
Check the sheeting periodically for holes and seal if necessary with suitable tape. Air infiltration during storage as a result of poor compaction and sealing can increase dry matter losses by as much as 8%.
Is it necessary to sheet a grass silage clamp overnight?
Clamps should always be sheeted down at night or if filling stops for any longer than six hours. It does not take long and will minimise air exposure and prevent rain ingress with uncovered silos.
After sheeting, the oxygen level throughout the silo starts to fall quickly, due to the continued activities of plant enzymes and aerobic microorganisms. If the clamp is not sheeted, oxygen levels will remain high in the outer layers. This will delay the onset of fermentation and allow aerobic activity to continue, especially near the surface. This will increase losses – which may be seen as a layer of poor quality silage when the clamp is opened. Prolonged exposure to air will lead to an increase in the numbers of yeasts – increasing the risk of losses from aerobic spoilage (heating) at feed-out.
To get an idea of how much aerobic activity is occurring overnight, try pushing your hand into the forage the next morning – you will feel the heat.
How to weight down grass silage sheets?
It is best to apply an even pressure over the whole surface of the clamp to prevent the sheet flapping and air getting in. Touching tyres or lorry sidewalls on top of the woven sheet can be used on unroofed clamps; and either touching tyres/lorry sidewalls or hay/straw bales used on top of the woven sheet on roofed clamps. A few tyres or bales scattered over the top is not sufficient.
Gravel bags on top of the woven sheet can also be used to maintain pressure around the clamp edges.